The House That Stamps Built; Project of the week: 11-16-15
Hello stampers! The Crafty Nurse here with some creative play for The House that Stamps Built project of the week. I can’t get enough of the Brushos Watercolors and today I’ve got a great way to use Brusho’s for adding color to your flowers and leaves. Don’t forget I’m offering a 10% discount to the Repeat Impressions Store (discount code on my blog sidebar).
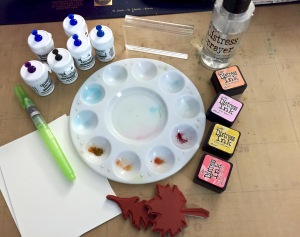
For this project the supplies I used are:
- Brusho’s Craft Spritzer Set
- Water Bottle
- Distress Ink – I used Spun Sugar, Dried Marigold, Fossilized Amber, and Worn Lipstick.
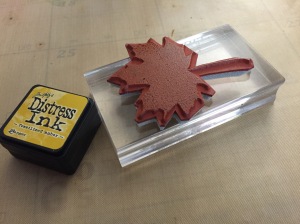
- An acrylic block
- A Waterbrush
- Watercolor Ink Palette
- Paper – I used 140 lb Watercolor but you can use your favorite.
- Repeat Impressions Stamps of your choice, I used: Maple Leaf 5127-K and Oak Leaf 5110-I
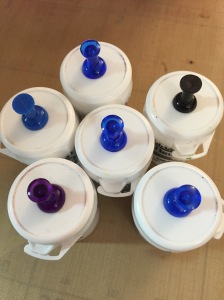
Before we begin, I wanted to share with you how I store my Brusho’s. I use a push pin to create a hole in the top and then keep the pins in the bottle so I don’t lose any powder. When you want to use the pigment, remove the pin and shake it out. Easy as pie.
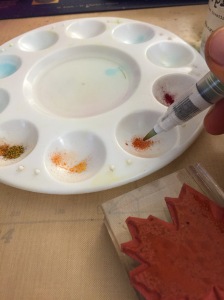
To prepare our ink palette shake the Brusho’s pigment into the wells.I used Orange, Sunburst Yellow, Alizarin Crimson, and Sea Grass Green.

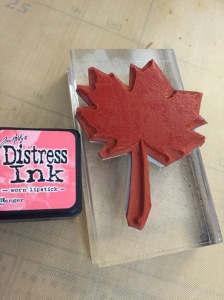
Step 1: Ink stamp with distress ink. The first one I used was Fossilzed Amber. Make sure the entire stamp is covered.
Step 2: With your water brush, apply a dabs of water to the surface of your inked stamp. This is why we are using Distress Ink because it plays so well with water. You can see that it’s activated that Fossilized Amber ink.

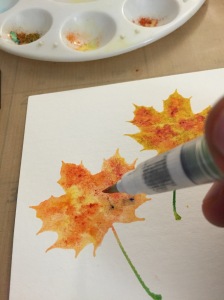
Step 3: Dip your water brush into the dry Brusho’s powder and apply to inked and watered stamp.
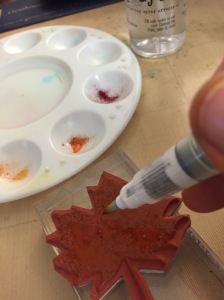
Step 4: After applying all your colors, hold up the image and give it a spritz of water. Here is a sample of how much water should be used below.
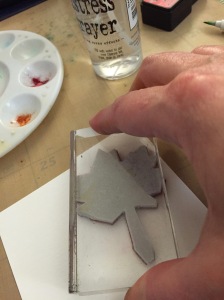
Step 5: Time to Stamp. The trick here is to make sure you use watercolor paper and once you stamp down, hold it for a count of no less than 5 seconds and 10 if you are not too impatient. That way the pigment makes good contact with the paper and really soaks in for the most vibrant outcome.
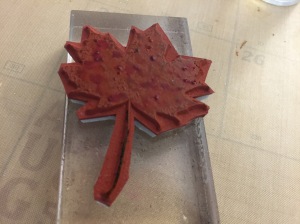
Step 6: If you need a little extra pigment you can always do a direct to paper application of the Brush’s with your water brush as I’m showing here.
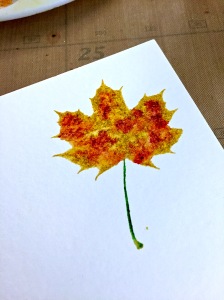
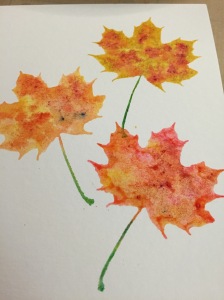
Step 7: Choose some alternate base Distress Inks to change up the colors of the leaves. I used Dried Marigold and Worn Lipstick.

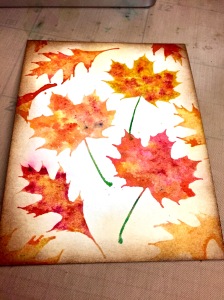
You can see my sample and tell the differences in the base color. The top right is Fossilized Amber, The left is Dried Marigold and the bottom right is Worn Lipstick.
Step 8: Finish stamping your panel and distress. I used Antique Linen and Gathered Twigs.
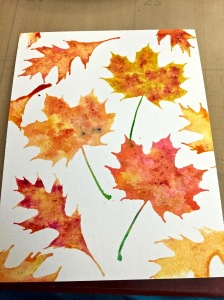
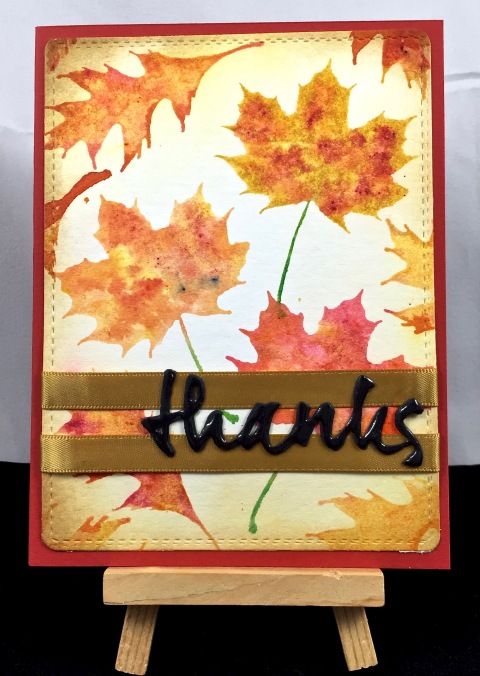
Here is my final card made by watercoloring with Brusho’s. To finish the card I cut out the panel using a WPlus9 stitched die, added Ellen Hutson Ribbon, and die cut a Papertrey Ink Thanks die which I topped with Pico Embellisher in shimmer. I can’t wait to break this technique out on other floral stamps.
I hope you’ve enjoyed how to watercolor with Brusho’s. I hope you’ll join us this week for Karen’s Designer Choice Challenge at The House That Stamps Built which focuses on “sentiments” where you will have a chance at a $25.00 gift certificate.
Beginning Wednesday, November 18th, we are having a “Photo Inspiration” Challenge that I know you’ll love!
I wish you a wonderful rest of the week!
The Crafty Nurse
Posted on November 16, 2015, in Repeat Impressions and tagged Brusho's Watercolor, Ellen Hutson Ribbon, Papertrey Ink Die, Pico Embellisher Irresistible, Repeat Impressions Stamps, Wplus9 Die. Bookmark the permalink. 2 Comments.


This is beautiful, Kathy! Thanks for the tutorial on this product…I needed it! Hugs…
LikeLike
One word….FABULOUS!!! Beautiful Card 🙂
LikeLike